Thursday, February 23, 2012

Pizza Fun


I don't know how many times now that I have restarted writing this blog entry.. I think I am a bit rusty at it! Today the sun was shining and the temperature was beautiful on the Island. My oldest was home from school with a bad cough for the second day in a row - but I can guarantee you that he is going back tomorrow no matter what! He was the epitome of stir crazy.

Anyways, a while back my husband kneaded out an extra batch of pizza dough, so we decided to see how well it would freeze. Today I pulled it out of the freezer to see if it would still be as good as the first batch he had made. Low and behold it was! So after a long day of speaking nicely to my children about their volume level when the little one was sleeping... wait who am I kidding, after spending the day arguing and yes out right yelling at them to be quiet while their sister was asleep in her crib, I asked them to help me make supper.

Aiden was more than happy to help with the rolling of the dough. ( Speaking of the dough you can find the recipe at the bottom of this post.) After we rolled it out we cut it into circles using whatever I could find, which happened to be a pyrex round dish that worked perfectly. As you can see Aiden was having a blast being a "cooker" as he would call it!
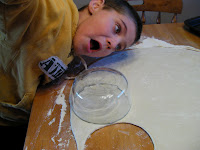
So after rolling out the dough we cut half of it into circles for the kids to "decorate" themselves. Zoanna had no problem deciding what to put on her pizza, o and don't worry there was no confusing whose pizza was whose... Zoanna was very concerned about that - funny thing is when we served the hot pizza at supper she looked at me and said "Mom, you know I don't like to eat pizza" haha..made me smile.

I guess in the end, my day wasn't so terrible. I managed to find a rainbow among the storm clouds of stir crazy children! The moral of the story as you can plainly see is... well I don't know what it is. I just know that I love those smiling faces! AND we enjoyed cooking together. So how do you combine your favorite things? I love being in the kitchen and I usually like being in there alone, but this time for pizza making, I can make an exception!

Happy Eating!

Alicia


Pizza Dough:
2 1/4 tsp Active Dry Yeast
1 1/3 Cup warm water
3 1/2 - 3 3/4 Cups Flour
1 Tbls olive oil
1 Tbls sugar
1 Tbls salt
Cornmeal

1. Combine yeast and water and proof it.
2. In separate bowl combine the remaining ingredients.
3. Add proofed yeast and water mixture to dry ingredients and knead for roughly 10 minutes, until dough is soft and no longer sticky - adding flour as needed.
4. Cover and let rise until double in size, around 90 minutes
5. Preheat oven to 450 degrees
6. Roll dough into a ball and let rest for 10 minutes.
7. Prepare your baking pan by dusting it with a layer of cornmeal
8. Using your hands or a rolling pin, shape dough into desired shape
9. Place dough on prepared pan.  Brush with extra oil and dent the dough with your thumb to prevent air pockets from forming when the pizza is cooking.
10.  Top your pizza with all your favorite toppings and bake in the oven for 12-15 minutes.

Enjoy!

As an aside note, after step 4, you can wrap your dough ball in plastic wrap and freeze it for another day.  We often double the recipe so we can have a meal that night and plan ahead for another meal.  See our menu boards for some ideas on how to plan ahead.

And yet a little more organization....

Okay, I think that I have just spent the best $3 ever!  I decided to continue on with my organizing spree, but I wanted to pick an area that really needed a pick me up.  Funny enough, the area that first came to mind was under my kitchen sink.  It was overflowing with recycling, stained on the bottom from past water leaks, and just ugly and disorganized.


Okay, so I did happen to take out the recycling and clear away some of the clutter before remembering to take the before picture.

I picked up 2 rolls of contact paper at the dollar store for $1.50 per roll, and 2 new baskets in pink that picked up the pink pinstripe in the contact paper.  And there was enough left over to cover over the garbage can as well...

Voila.....a much more appealing cupboard!


And one final touch, I needed a place to store the
                                                                                rubber gloves as I got rid of the old container that held several pairs.  I used a fancy clothes pin bought a while back at Michaels (6 epoxied clothespins for $1.50).  I stuck it on with doubled sided foam tape and I now have somewhere out of the way but easily accessible to hang my gloves. 


Tuesday, February 21, 2012

A little more organization never hurt anybody!

So lately all the blogs that I have stumbled across or follow have been talking about organization!

I signed back up for Fly Lady, which in the past, has done wonders to help me keep my house functional, clean and organized.  It's really worth checking out.  You get daily emails with a 15 minutes task to do, special challenges, and monthly focuses.  It's an awesome cleaning plan where they constantly encourage to do what you can when you can.

I also stumbled across a blog, that initially I told myself I would NEVER look at :)  And you know what happens when you say never!  My initial issue was that I read the blog address (and therefore the blog title) wrong.  The blog address is www.imperfecthomemaking.com.  Now, it would make sense to read it as imperfect homemaking, but I however only saw I'm Perfect homemaking.  Maybe a sore point I need to deal with?!?  This site has a great series done back in October on 31 days to organizing your home.  I did day one and loved the changes.  Picture is coming, i forgot a before  picture, and i will take an after one once DH hangs the new photo frame turned white board for remembering what is in the bin to give back to others!

And that was it, once I started, I just couldn't stop.  I saw a neat  picture with cool jars for keeping laundry soap in.  Well, I want to display my homemade laundry soap in a pretty jar too, along with the extra baking soda and vinegar for stains and smells.  This time, I did remember the before and after pics. 


Pin It
So, what cool things have you guys been doing to organize your household?


Sunday, February 19, 2012

Homemade Laundry Soap

I guess it has been about just over two years ago that we bought our second largest appliance purchase - our front loading LG washer and dryer. Funny enough we had to sell them when we moved from Alberta to BC in December (now the cleaning pair sits in Nadine's laundry room!). Being the first time we owned an HE washing machine, I had to take a harder look at the laundry soap that we were using. My husband's parents had purchased an HE washing machine and, unaware of the importance of the type of laundry soap they needed, they used regular detergent. In about a year they had to do some serious repairs because of the damage caused by too much suds and bubbles. So in their hard learned lesson I knew that I needed to find an alternative. At first we started by using Costco's Kirkland HE laundry soap, but soon realized that the price was pretty high despite the savings being that it was from Costco. So in conversation with my good high school friend living in Ontario, I found my first solution. Here is the recipe of the first attempt at making homemade, eco friendly laundry soap:

1 Bar of Soap, grated
1 Cup Washing Soda
1/2 Cup Borax
3 Gallons of water

Bring 4 cups of the water to just under a boil, add the grated bar of soap, stir until dissolved
Heat 3 gallons of water - I just turned the kitchen tap to the hottest setting
Add the washing soda, and Borax to the 3 gallons of hot water, stir until dissolved
Add the soap mixture, stir and let set for roughly 24 hours.
Use 1 Cup of "gel" for every regular laundry load.

Now I found that this laundry soap worked extremely well for us. At the time we had a potty training youngster who had more than a few accidents in bed and in their clothes, and every time this detergent would get the smell out. The one major downside to this recipe was the space factor. Finding a container large enough to hold the "gel". As well, the mixture would separate on occasion - no big deal really, I just kept a long wooden spoon on hand to mix back together.

I used this for about 6 months or so when I found myself talking with my same friend from Ontario. She had come across a new laundry soap recipe that she enjoyed. It goes something like this:

1 Bar of Soap
1/2 Cup Washing Soda
1/2 Cup Borax
1/2 Cup oxi-clean (optional)
5-10 drops of essential oil (I use lemon)

Mix all ingredients together
Use 1-2 tablespoons depending on the dirtiness of your laundry load.
Enjoy! Alicia.

I would have to second all that Alicia has to say :)  This laundry soap is amazing! It's cheap!  And it works.  And for those of us who live on the peninsula, you only need to use 1/2 tbsp per load as the local residential information is that we only need half the recommended amount of soap due to our very soft water conditions.

Nadine :)

Saturday, February 18, 2012

Menu Boards....

Okay, I am totally blaming Alicia for the fact that we have not blogged in over 5 months! She had a baby and I have been very preoccupied staring at her little bundle of cuteness. But all excuses aside, we have a super cool kitchen related project to share with everyone.

I stumbled upon the inspiration for this board at Robby Gurls Creations which i stumbled across through pinterest.

We have been talking about trying to meal plan for ages. We know for sure that when we meal plan our grocery budgets are better, we are more likely to have dinner made on time each night, and we have way less stress. So, without further ado, I introduce you to our menu planning boards....


This is my board, I did mine in primary colors just to add a little bit of color and excitement to my kitchen. (And hopefully it will keep my eyes from glossy over and forgetting all about it!)

For each day there are small tags to remind you what you will be making for dinner that day. The hanging file cards at the bottom are color co-ordinated to match the small tags depending on the types of food category.

We made 6 categories of recipes:
chicken, beef, side dishes, soup, desserts, & miscellaneous

The board is then accessorized with fancy magnets to hold up the small tags and the month labels.  We priced things out and all in all it ended up costing about $40 to make the boards.  The biggest cost was the board itself, which we were only able to get at Walmart for $19.97.  The paper and stones came from Michaels Art Store.  The binder rings were a dollar store find!  The button magnets and magnet tape can be bought at Walmart as well.

(And while I think of it, for you technies who notice each detail...yes it says that Alicia wrote this post, but it was actually me (Nadine)).

Here is Alicia's awesome board!  She went for a blue and green color theme with the same recipe categories.  Now, our job over the next few weeks is to print out our recipe cards to make this board fully functional.

Pin It